Introduction
Walking into a dark theatre production and seeing the stage transform with vibrant colours and dramatic shadows is pure magic. If you are stepping behind the lighting desk for the first time, looking at all those faders, buttons, or software screens can feel incredibly overwhelming. But here is the secret: programming your first theatre light show is just like building a puzzle. You look at one piece at a time. Whether you are lighting a local play or setting up a small stage showcase, learning the basics of DMX control will completely change how you approach live performance. You do not need a West End budget to create a stunning atmosphere—you just need a solid plan.
Step 1: Preview (The Patch)
Before you can control a single beam of light, your console needs to know what is plugged in and where it lives. This process is called patching. Think of it like assigning a phone number to each light fixture. You tell your software or desk that the LED wash light stage left is listening on DMX Channel 1, the spotlight is on Channel 10, and so on. Once your patch is locked in, the real creativity begins.
Step 2: Building Your Scenes (The State)
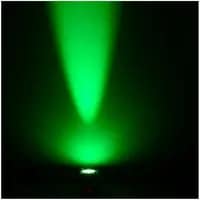
Once your lights are patched, you can start painting the stage with light. In theatre, a frozen moment of lighting is called a “scene” or a “lighting state.” When building a scene, always start with visibility. Your audience needs to see the actors’ faces. Use your warm white spotlights or front washes first to illuminate the downstage and upstage acting areas. Once your actors are visible, add the mood. Use your LED wash lights to flood the stage background with colour. Cool blues and cyans create a somber, nighttime, or melancholic atmosphere. Rich ambers and oranges instantly suggest warmth, daytime, or comfort. Work fixture by fixture until the stage looks exactly how you want it, then hit “Record.”
Step 3: Creating the Cue List (The Playback)
A theatre show is a sequence of these recorded scenes, triggered one after another. This sequence is your Cue List. Your first recorded scene becomes Cue 1 (usually the pre-show look while the audience walks in). Your next scene becomes Cue 2 (the opening scene of the play).The magic of theatre programming lies in the fade time. When you program Cue 2, you must decide how long it takes to transition from Cue 1. A sudden blackout should happen in 0 seconds. A gentle sunset transition might take 8 to 10 seconds. Your lighting controller software handles the math; you just program the trigger.
Top Tips for Beginners
Label Everything:
Do not leave your cues named “Cue 1” and “Cue 2.” Use labels like “Cue 1 – Pre-show,” “Cue 2 – Act 1 Opening,” or “Cue 3 – Main Character Entrance.
Keep It Simple:
You do not need moving lights or flashing strobes to make a show look professional. A static, well-colored scene with good facial visibility beats a messy, distracting light show every time.
Back Up Your Work:
Always save your show file to a USB stick after every rehearsal. If the lighting desk crashes or the power cuts out, you will thank your past self.
Conclusion
Programming your first show is all about trial and error. Sit in the middle of the empty theatre during technical rehearsals, play with the color wheels, and see how the light hits the stage. With a clear patch, well-designed scenes, and a clean cue list, you will guide the audience’s eyes exactly where they need to look.